
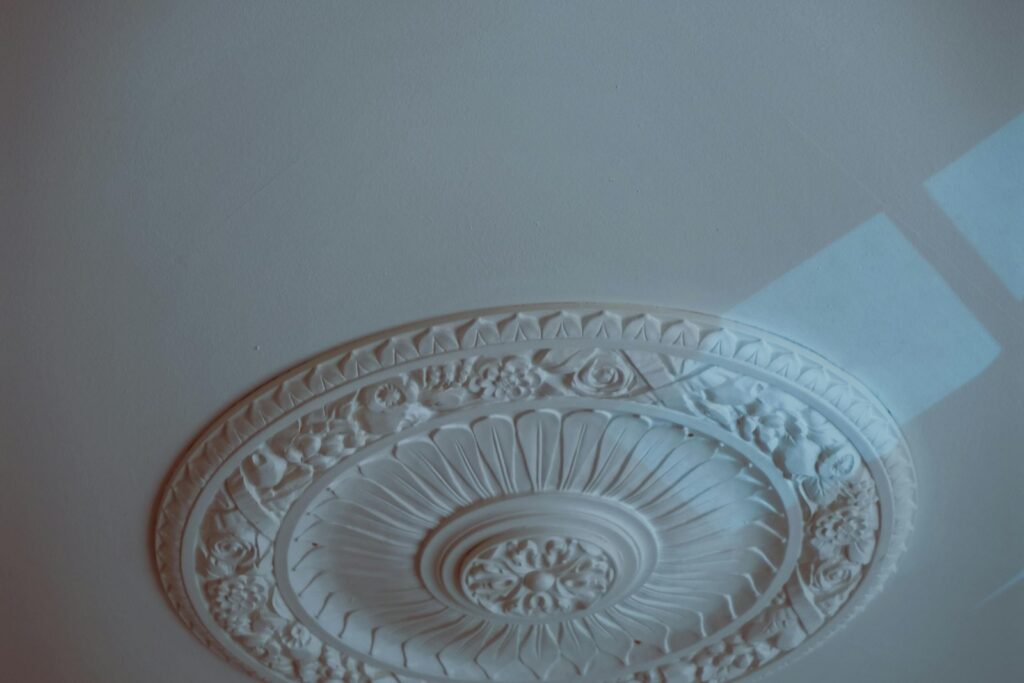
A Victorian ceiling rose (also called a ceiling medallion in the U.S.) is not painted the same way as a flat ceiling. The relief of the moldings disappears under two badly-rolled passes, hairline cracks re-open as soon as the filler dries, and a finish that’s too glossy lights up every flaw in the old plaster. I have restored dozens of them across central France — old estates, manor homes, and historic townhouses with original plaster and horsehair — and the process is always the same, in the right order. Here is the exact sequence, the products I actually use on the job, and the mistakes that cost DIYers three weekends for a result a pro has to redo afterward.
How do you restore a damaged Victorian ceiling rose?
The eight-step sequence: vacuum the dust off, wash the surface with TSP (trisodium phosphate) to cut grease, open the hairline cracks with a knife, fill the unreachable detail with flexible acrylic caulk (24 hours of drying minimum — non-negotiable), apply a thin coat of patching compound on the reachable flats with a taping knife, sand to 180–220 grit, lay down one coat of acrylic primer, then two coats of matte topcoat by sprayer or by stippled brush. None of these steps is optional.
That is the skeleton. Now the details that decide whether the work lasts ten years or peels in six months.
The single most common amateur mistake is to jump straight to filling without prepping the substrate. An old ceiling rose has often received five or six layers of paint over a century and a half, plus cooking grease, nicotine, and dust. Any filler you apply on top of that contamination will let go within six months. Vacuuming with a soft brush attachment over the detail, then washing with TSP — these are not “if-you-have-time” steps. They are what makes the work hold for a decade or more. If your surface still feels tacky or has dark stains after washing, see our full guide on why paint won’t stick to old plaster before you touch anything else.
Once the substrate is clean and dry, I open the hairline cracks with a putty knife. This is the counter-intuitive move for non-pros: you deliberately widen the crack before filling it. The reason is simple — caulk and patching compound will not bond inside a capillary crack. They need volume to anchor. Without that step, the crack re-appears at the first thermal shock in winter.
Which filler should you use to patch an old ceiling rose?
Two products, two distinct uses. Flexible acrylic caulk (DAP Alex Plus or equivalent) for hairline cracks and any decorative recess a knife blade cannot reach — applied with the fingertip, tooled flush, and left to dry a full 24 hours. Then a thin patching compound (DAP DryDex or USG Sheetrock Plus 3, applied as a tight skim) on the reachable areas with a 6″ taping knife, with the edges feathered out using a damp brush. Never the other way around.
The 24-hour caulk drying time is the point no online tutorial explains correctly. If you skim patching compound over caulk that is still fresh, the moisture trapped inside the old plaster — moisture the successive paint layers have sealed in for decades — pushes the caulk upward. The caulk splits, the crack re-opens, and you start over. Twenty-four hours is the time that moisture needs to escape through the still-porous caulk.
For the patching compound, the rule is to load as thin as you can. The less compound you put down, the easier it sands, and the more decorative relief you preserve. Taping knife for the body, fingertip for the corners, damp brush to feather transitions. A beginner tends to load thick “just to be safe” — that’s exactly the wrong instinct on a ceiling rose.
💡 From the job site
In 2024, I restored a heavily damaged, deeply detailed ceiling rose in an old townhouse in central France. Original plaster, several layers of caked paint that had drowned the acanthus leaves. Full process: vacuum, TSP wash, crack-opening, acrylic caulk applied with the fingertip in the unreachable detail, 24 hours dry, thin patching compound on the flats with a taping knife, light 180-grit sanding, acrylic primer, two coats of matte by Graco HVLP sprayer. Result was startling — the molding relief came back out, and the homeowner had not seen that rose in that condition since the day he bought the house.
Do you need to sand a ceiling rose between coats?
Yes, but only after the patching compound is fully dry, and only with a fine grit between 180 and 220. Coarser and you scar the old plaster and lose the molding lines. Finer and you do not remove the ridge of the patch. The sanding is done by hand, never with a power sander, on the decorative relief — folded paper pushed into the curves with the fingertip. For tool recommendations, see our breakdown of the best sanding tools for wood and drywall — the same fine-grit selection applies here.
On the flat areas around the rose, a rectangular sanding block works fine. But the moment you enter the ornament — leaves, beads, egg-and-dart, dentils — it is paper in the hand, finger pushing, and you stop the second the surface feels smooth. Over-sanding old molding rounds off edges the original craftsman shaped with a modeling tool. That damage does not come back.
Between topcoat passes, no sanding. Just a dusting with a microfiber cloth or vacuum brush. The acrylic film should stay intact unless you can see a visible defect.
What paint works best for a Victorian ceiling rose?
One coat of acrylic primer first, then two coats of matte finish. Acrylic primer dries in two hours, cleans up with water, and bonds perfectly to a properly-prepped surface. Matte is the default finish on a ceiling rose because it does not flatten the relief and does not throw light onto the imperfections of the old plaster.
Plenty of tutorials default to an oil-based primer to “lock in” the substrate. On a ceiling rose that has been properly cleaned, washed, and filled, that is unnecessary. Acrylic primer bonds fine, dries in two hours instead of twelve, and washes off with water. The only time I switch to a stain-blocker is when the substrate still shows tannin or nicotine bleed-through after washing — in which case a dedicated stain-blocking primer like Zinsser B-I-N is far better than a generic oil-based product.
On the matte topcoat itself, the brand matters less than the pigment quality. A high-end matte like Sherwin-Williams Emerald Designer Edition Matte or Behr Premium Plus Ultra Matte gives a deep finish and tolerates gentle cleaning. A bargain-tier matte will show roller marks and chalk on the surface inside two years. On a ceiling rose a homeowner is going to look at for twenty years, this is not the place to save fifteen dollars on a can.
🛠 Tools and products I actually use
- Surface wash: Savogran TSP (trisodium phosphate) cleaner or equivalent
- Flexible filler (unreachable areas): DAP Alex Plus acrylic caulk or equivalent
- Patching compound (reachable areas): DAP DryDex, USG Sheetrock Plus 3, or comparable lightweight spackle
- Sanding: 180–220 grit sandpaper, by hand (folded sheets for the relief, block for the flats)
- Primer: any pro-grade acrylic primer; Zinsser B-I-N only if you see tannin or nicotine bleed
- Topcoat: high-end matte (Sherwin-Williams, Behr Premium Plus Ultra, or equivalent professional line)
- Ideal application: Graco HVLP sprayer (TrueCoat 360 or Magnum X5), nozzle per the paint manufacturer’s data sheet
- Backup application: high-quality finishing brush + the stippling technique
Can you paint a ceiling rose with a brush or do you need a sprayer?
The HVLP sprayer remains the ideal method: paint lays down in a thin even film without pooling in the detail. I use a Graco with the nozzle the paint manufacturer recommends. A brush works too, on one condition — you must stipple, not stroke sideways, or the paint runs and fills the decorative recesses.
The stippling technique means the brush comes down perpendicular to the surface, drops the paint, and lifts straight up. You repeat until you cover, never dragging laterally. It takes three times longer than spraying, but it is the only way to preserve the molding pattern when you do not own the gear.
For very large roses — anything past 32 inches (80 cm) in diameter — a sprayer becomes almost mandatory if you want a professional finish. At that diameter, a brush will always leave visible lap marks under raking light. For a standard rose 16–24 inches across, a patient painter with a good finishing brush can get a clean result by hand.
⚠️ The rookie mistakes to avoid
Trap number one: loading the patching compound thick to “go faster.” The more thickness you put on, the harder it is to sand without scarring the relief, and the more the molding pattern disappears. Trap number two: rolling the rose to save time. A roller drowns the decorative recesses in two passes — there is no recovery short of full strip. Trap number three: skipping the 24-hour caulk dry. The cracks re-open within weeks and you redo everything from scratch.
What if the ceiling rose sits on lath and horsehair plaster?
On old lath-and-plaster ceilings with original horsehair binder, the paint process is identical. On every job I have done, the rose itself stayed solidly attached to the structure and I have never had to redo the mechanical fixing. If the rose moves or sounds hollow under fingertip pressure, that is a mechanical repair to handle before any paint goes on. For the underlying ceiling, our guide on how to repair plaster walls covers crack repair, lath consolidation, and when to call a pro.
The simple test: gently press your fingertip at the center of the rose. If it does not move and does not sound hollow, you are clear to paint. If it gives a little, or the pressure reveals play, consult a plasterer for a re-fixing with bonding plaster or specialty screws before any paint work. It is rare, but it does happen on buildings where the roof has leaked for years.
FAQ
How long does it take to paint a Victorian ceiling rose properly? Plan three working days spread over a week for clean work: day 1 vacuuming, TSP wash, crack-opening, first pass of acrylic caulk. Day 2 (24 hours later) patching compound on the reachable areas. Day 3 sanding, primer, first topcoat coat. A final topcoat pass 4–6 hours after the first. Trying to do everything in a weekend always produces a disappointing result.
Can you strip a paint-clogged ceiling rose without damaging the plaster? A heat gun is to be banned absolutely on an old ceiling rose: the heat makes the plaster pop and cracks the fine detail. Use a chemical paint stripper like Peel-Away 7 applied as a thick layer, covered with the supplied paper, and left to work for 24 to 48 hours before careful rinsing. It is slow and messy, but it is the only method that respects the substrate.
Which matte paint hides imperfections in old plaster? A deep, high-end matte — Sherwin-Williams Emerald Designer Edition Matte, Behr Premium Plus Ultra Matte, or a comparable professional line. The hiding power and pigment quality mask small surface variations. Avoid bargain-tier mattes, which show lap marks under raking light, especially on a ceiling where overhead or pendant lighting accents every flaw.
Should you remove the ceiling rose to paint it properly? No, except in the rare case where it is fully detached or you want to chemically strip it on a workbench. Removing an old ceiling rose almost always weakens the original plaster structure and risks breaking the piece. Mask off properly with drop cloths and painter’s tape, paint in place with patience — that is always the better option on historic detail.
How much does professional ceiling rose restoration cost? It varies with condition, diameter, and ornament complexity. A 20-inch rose in good shape that only needs cleaning and a fresh matte recoat is a half-day of labor. A heavily damaged rose that needs chemical stripping, full filling, and sprayed finish easily runs 1.5 days of labor plus materials. A homeowner doing the same work alone typically spends three times as long for a result that falls short.
The bottom line
A well-restored Victorian ceiling rose buys you thirty years of peace and a character element that lifts the whole room. The secret is not a miracle product or an exotic tool — it is in the sequence respected and the drying times held. Caulk for 24 hours, patching compound in thin coats, 180–220 grit sanding, acrylic primer, two coats of matte. A Graco sprayer saves time, but a good brush worked in the stippling technique gives the same finish if you are patient. The same prep logic applies to every other historic decorative surface — crown molding, wall reliefs, coffered ceilings: clean it, fill it, sand it, prime it, finish it, in that order.
Get Your Free Home Renovation Checklist
Join 500+ homeowners saving money on their renovations. Free checklist + weekly tips.